help - js
ldap.plantas.vip http://ldap.namapi.org ldap.kivie.in
web ldap manager
ldapjs Client API
This document covers the ldapjs client API and assumes that you are familiar with LDAP. If you're not, read the guide first.
Create a client
The code to create a new client looks like:
const ldap = require('ldapjs');

const client = ldap.createClient({
  url: ['ldap://127.0.0.1:1389', 'ldap://127.0.0.2:1389']
});

client.on('error', (err) => {
  // handle connection error
})
You can use ldap:// or ldaps://; the latter would connect over SSL (note that this will not use the LDAP TLS extended operation, but literally an SSL connection to port 636, as in LDAP v2). The full set of options to create a client is:
| Attribute | Description |
|---|---|
| url | A string or array of valid LDAP URL(s) (proto/host/port) |
| socketPath | Socket path if using AF_UNIX sockets |
| log | A compatible logger instance (Default: no-op logger) |
| timeout | Milliseconds client should let operations live for before timing out (Default: Infinity) |
| connectTimeout | Milliseconds client should wait before timing out on TCP connections (Default: OS default) |
| tlsOptions | Additional options passed to TLS connection layer when connecting via ldaps:// (See: The TLS docs for node.js) |
| idleTimeout | Milliseconds after last activity before client emits idle event |
| strictDN | Force strict DN parsing for client methods (Default is true) |
| reconnect | Try to reconnect when the connection gets lost (Default is false) |
url
This parameter takes a single connection string or an array of connection strings as an input. In case an array is provided, the client tries to connect to the servers in given order. To achieve random server strategy (e.g. to distribute the load among the servers), please shuffle the array before passing it as an argument.
Note On Logger
A passed in logger is expected to conform to the Bunyan API. Specifically, the logger is expected to have a child() method. If a logger is supplied that does not have such a method, then a shim version is added that merely returns the passed in logger.
Known compatible loggers are:
Connection management
As LDAP is a stateful protocol (as opposed to HTTP), having connections torn down from underneath you can be difficult to deal with. Several mechanisms have been provided to mitigate this trouble.
Reconnect
You can provide a Boolean option indicating if a reconnect should be tried. For more sophisticated control, you can provide an Object with the properties initialDelay (default: 100), maxDelay (default: 10000) and failAfter (default: Infinity). After the reconnect you maybe need to bind again.
Client events
The client is an EventEmitter and can emit the following events:
| Event | Description |
|---|---|
| error | General error |
| connectRefused | Server refused connection. Most likely bad authentication |
| connectTimeout | Server timeout |
| connectError | Socket connection error |
| setupError | Setup error after successful connection |
| socketTimeout | Socket timeout |
| resultError | Search result error |
| timeout | Search result timeout |
| destroy | After client is disconnected |
| end | Socket end event |
| close | Socket closed |
| connect | Client connected |
| idle | Idle timeout reached |
Common patterns
The last two parameters in every API are controls and callback. controls can be either a single instance of a Control or an array of Control objects. You can, and probably will, omit this option.
Almost every operation has the callback form of function(err, res) where err will be an instance of an LDAPError (you can use instanceof to switch). You probably won't need to check the res parameter, but it's there if you do.
bind
bind(dn, password, controls, callback)
Performs a bind operation against the LDAP server.
The bind API only allows LDAP 'simple' binds (equivalent to HTTP Basic Authentication) for now. Note that all client APIs can optionally take an array of Control objects. You probably don't need them though...
Example:
client.bind('cn=root', 'secret', (err) => {
  assert.ifError(err);
});
add
add(dn, entry, controls, callback)
Performs an add operation against the LDAP server.
Allows you to add an entry (which is just a plain JS object), and as always, controls are optional.
Example:
const entry = {
  cn: 'foo',
  sn: 'bar',
  email: ['foo@bar.com', 'foo1@bar.com'],
  objectclass: 'fooPerson'
};
client.add('cn=foo, o=example', entry, (err) => {
  assert.ifError(err);
});
compare
compare(dn, attribute, value, controls, callback)
Performs an LDAP compare operation with the given attribute and value against the entry referenced by dn.
Example:
client.compare('cn=foo, o=example', 'sn', 'bar', (err, matched) => {
  assert.ifError(err);

  console.log('matched: ' + matched);
});
del
del(dn, controls, callback)
Deletes an entry from the LDAP server.
Example:
client.del('cn=foo, o=example', (err) => {
  assert.ifError(err);
});
exop
exop(name, value, controls, callback)
Performs an LDAP extended operation against an LDAP server. name is typically going to be an OID (well, the RFC says it must be; however, ldapjs has no such restriction). value is completely arbitrary, and is whatever the exop says it should be.
Example (performs an LDAP 'whois' extended op):
client.exop('1.3.6.1.4.1.4203.1.11.3', (err, value, res) => {
  assert.ifError(err);

  console.log('whois: ' + value);
});
modify
modify(name, changes, controls, callback)
Performs an LDAP modify operation against the LDAP server. This API requires you to pass in a Change object, which is described below. Note that you can pass in a single Change or an array of Change objects.
Example:
const change = new ldap.Change({
  operation: 'add',
  modification: {
    pets: ['cat', 'dog']
  }
});

client.modify('cn=foo, o=example', change, (err) => {
  assert.ifError(err);
});
Change
A Change object maps to the LDAP protocol of a modify change, and requires you to set the operation and modification. The operation is a string, and must be one of:
| Operation | Description |
|---|---|
| replace | Replaces the attribute referenced in modification. If the modification has no values, it is equivalent to a delete. |
| add | Adds the attribute value(s) referenced in modification. The attribute may or may not already exist. |
| delete | Deletes the attribute (and all values) referenced in modification. |
modification is just a plain old JS object with the values you want.
modifyDN
modifyDN(dn, newDN, controls, callback)
Performs an LDAP modifyDN (rename) operation against an entry in the LDAP server. A couple points with this client API:
- There is no ability to set "keep old dn." It's always going to flag the old dn to be purged.
- The client code will automatically figure out if the request is a "new superior" request ("new superior" means move to a different part of the tree, as opposed to just renaming the leaf).
Example:
client.modifyDN('cn=foo, o=example', 'cn=bar', (err) => {
  assert.ifError(err);
});
search
search(base, options, controls, callback)
Performs a search operation against the LDAP server.
The search operation is more complex than the other operations, so this one takes an options object for all the parameters. However, ldapjs makes some defaults for you so that if you pass nothing in, it's pretty much equivalent to an HTTP GET operation (i.e., base search against the DN, filter set to always match).
Like every other operation, base is a DN string.
Options can be a string representing a valid LDAP filter or an object containing the following fields:
| Attribute | Description |
|---|---|
| scope | One of base, one, or sub. Defaults to base. |
| filter | A string version of an LDAP filter (see below), or a programatically constructed Filter object. Defaults to (objectclass=*). |
| attributes | attributes to select and return (if these are set, the server will return only these attributes). Defaults to the empty set, which means all attributes. You can provide a string if you want a single attribute or an array of string for one or many. |
| attrsOnly | boolean on whether you want the server to only return the names of the attributes, and not their values. Borderline useless. Defaults to false. |
| sizeLimit | the maximum number of entries to return. Defaults to 0 (unlimited). |
| timeLimit | the maximum amount of time the server should take in responding, in seconds. Defaults to 10. Lots of servers will ignore this. |
| paged | enable and/or configure automatic result paging |
Responses from the search method are an EventEmitter where you will get a notification for each searchEntry that comes back from the server. You will additionally be able to listen for a searchReference, error and end event. Note that the error event will only be for client/TCP errors, not LDAP error codes like the other APIs. You'll want to check the LDAP status code (likely for 0) on the end event to assert success. LDAP search results can give you a lot of status codes, such as time or size exceeded, busy, inappropriate matching, etc., which is why this method doesn't try to wrap up the code matching.
Example:
const opts = {
  filter: '(&(l=Seattle)(email=*@foo.com))',
  scope: 'sub',
  attributes: ['dn', 'sn', 'cn']
};

client.search('o=example', opts, (err, res) => {
  assert.ifError(err);

  res.on('searchEntry', (entry) => {
    console.log('entry: ' + JSON.stringify(entry.object));
  });
  res.on('searchReference', (referral) => {
    console.log('referral: ' + referral.uris.join());
  });
  res.on('error', (err) => {
    console.error('error: ' + err.message);
  });
  res.on('end', (result) => {
    console.log('status: ' + result.status);
  });
});
Filter Strings
The easiest way to write search filters is to write them compliant with RFC2254, which is "The string representation of LDAP search filters." Note that ldapjs doesn't support extensible matching, since it's one of those features that almost nobody actually uses in practice.
Assuming you don't really want to read the RFC, search filters in LDAP are basically are a "tree" of attribute/value assertions, with the tree specified in prefix notation. For example, let's start simple, and build up a complicated filter. The most basic filter is equality, so let's assume you want to search for an attribute email with a value of foo@bar.com. The syntax would be:
(email=foo@bar.com)
ldapjs requires all filters to be surrounded by '()' blocks. Ok, that was easy. Let's now assume that you want to find all records where the email is actually just anything in the "@bar.com" domain and the location attribute is set to Seattle:
(&(email=*@bar.com)(l=Seattle))
Now our filter is actually three LDAP filters. We have an and filter (single amp &), an equality filter (the l=Seattle), and a substring filter. Substrings are wildcard filters. They use * as the wildcard. You can put more than one wildcard for a given string. For example you could do (email=*@*bar.com) to match any email of @bar.com or its subdomains like "example@foo.bar.com".
Now, let's say we also want to set our filter to include a specification that either the employeeType not be a manager nor a secretary:
(&(email=*@bar.com)(l=Seattle)(!(|(employeeType=manager)(employeeType=secretary))))
The not character is represented as a !, the or as a single pipe |. It gets a little bit complicated, but it's actually quite powerful, and lets you find almost anything you're looking for.
Paging
Many LDAP server enforce size limits upon the returned result set (commonly 1000). In order to retrieve results beyond this limit, a PagedResultControl is passed between the client and server to iterate through the entire dataset. While callers could choose to do this manually via the controls parameter to search(), ldapjs has internal mechanisms to easily automate the process. The most simple way to use the paging automation is to set the paged option to true when performing a search:
const opts = {
  filter: '(objectclass=commonobject)',
  scope: 'sub',
  paged: true,
  sizeLimit: 200
};
client.search('o=largedir', opts, (err, res) => {
  assert.ifError(err);
  res.on('searchEntry', (entry) => {
    // do per-entry processing
  });
  res.on('page', (result) => {
    console.log('page end');
  });
  res.on('error', (resErr) => {
    assert.ifError(resErr);
  });
  res.on('end', (result) => {
    console.log('done ');
  });
});
This will enable paging with a default page size of 199 (sizeLimit - 1) and will output all of the resulting objects via the searchEntry event. At the end of each result during the operation, a page event will be emitted as well (which includes the intermediate searchResult object).
For those wanting more precise control over the process, an object with several parameters can be provided for the paged option. The pageSize parameter sets the size of result pages requested from the server. If no value is specified, it will fall back to the default (100 or sizeLimit - 1, to obey the RFC). The pagePause parameter allows back-pressure to be exerted on the paged search operation by pausing at the end of each page. When enabled, a callback function is passed as an additional parameter to page events. The client will wait to request the next page until that callback is executed.
Here is an example where both of those parameters are used:
const queue = new MyWorkQueue(someSlowWorkFunction);
const opts = {
  filter: '(objectclass=commonobject)',
  scope: 'sub',
  paged: {
    pageSize: 250,
    pagePause: true
  },
};
client.search('o=largerdir', opts, (err, res) => {
  assert.ifError(err);
  res.on('searchEntry', (entry) => {
    // Submit incoming objects to queue
    queue.push(entry);
  });
  res.on('page', (result, cb) => {
    // Allow the queue to flush before fetching next page
    queue.cbWhenFlushed(cb);
  });
  res.on('error', (resErr) => {
    assert.ifError(resErr);
  });
  res.on('end', (result) => {
    console.log('done');
  });
});
starttls
starttls(options, controls, callback)
Attempt to secure existing LDAP connection via STARTTLS.
Example:
const opts = {
  ca: [fs.readFileSync('mycacert.pem')]
};

client.starttls(opts, (err, res) => {
  assert.ifError(err);

  // Client communication now TLS protected
});
unbind
unbind(callback)
Performs an unbind operation against the LDAP server.
Note that unbind operation is not an opposite operation for bind. Unbinding results in disconnecting the client regardless of whether a bind operation was performed.
The callback argument is optional as unbind does not have a response.
Example:
client.unbind((err) => {
  assert.ifError(err);
});
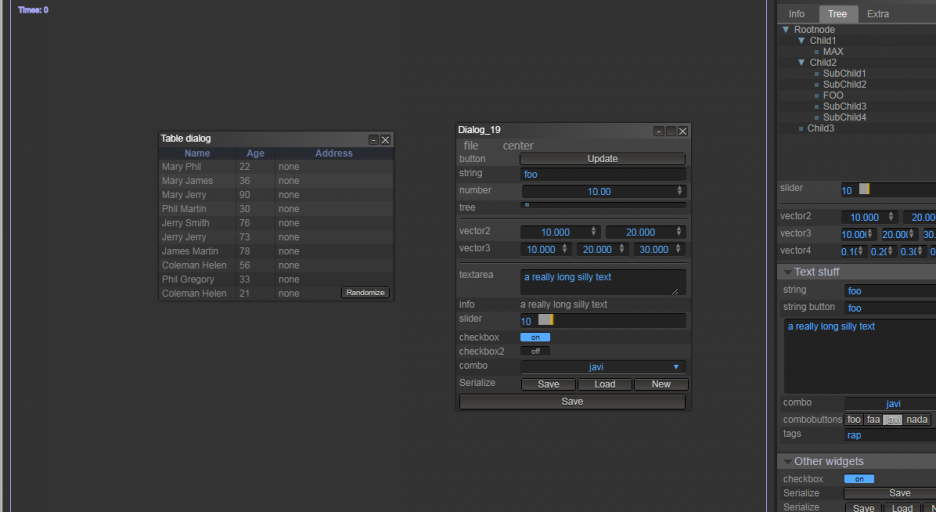
Litegui is a javascript library to create webapps with a desktop look-alike user interface. All the widgets, panels, dialogs, etc are created from Javascript instead of HTML. The upside of this is that this helps to create more dynamic interfaces and gives a lot of flexibility. The downside is that you'll need to write some code to make it all work. If you're looking for a library that just needs some HTML and a couple of event handlers to work, litegui is not what you're looking for. On the other hand, any advanced UI will need a lot of coding and in creating advanced UI's litegui shines.
Creating a UI
So let's start with building something simple. This first introduction will show you how to create a menubar and add some items to it. Please note that the javascript is brief on purpose and doesn't reflect javascript best coding practices. The goal here is to get you up and running as fast as possible.
Start with the following index.html:
<!DOCTYPE html>
<html>
<head>
    <title>Algae</title>
    <link type="text/css" rel="stylesheet" href="litegui.js/build/litegui.css">

    <script type="text/javascript" src="litegui.js/external/jscolor/jscolor.js"></script>

    <script type="application/javascript" src="litegui.js/build/litegui.js"></script>
</head>
<body>
    <script src="init.js"></script>
</body>
</html>
Add the following to init.js:
// Initialize litegui.js
LiteGUI.init();

// Create a menu bar
var menu = new LiteGUI.Menubar();

// Add some items to it
menu.add('File/New');
menu.add('File/Settings');
// This will be shown greyed out
menu.add('File/I\'m not clickable', { disabled: true });

// Add a second main menu item
menu.add('Help/Help');
menu.add('Help/About');

// Add the menu bar to litegui
LiteGUI.add(menu);
Now open index.html in your browser. You should see a menu bar on the top of the screen. That might be pretty nifty, but it's not yet doing anything usefull. Let's fix that by adding a settings dialog
Add the following code to init.js after the call to LiteGUI.init():
function createSettingsDialog() {
    // Create a new dialog
    var dialog = new LiteGUI.Dialog('Settings', { title:'Settings', close: true, minimize: false, width: 300, height: 500, scroll: false, resizable: false, draggable: true });

    // Create a collection of widgets
    var widgets = new LiteGUI.Inspector();
    var nameWidget = widgets.addString("Your name","foo");
    var ageWidget = widgets.addNumber("Your age", 35, { min: 0, max: 125 });

    dialog.add(widgets);

    // Placeholder function to show the new settings. Normally you would do something usefull here
    // with the new settings.
    function applySettings() {
        console.log("Your name is " + nameWidget.getValue() + ", and you are " + ageWidget.getValue() + " years old");
    }

    // Add some buttons
    dialog.addButton('Ok', { close: true, callback: applySettings });
    dialog.addButton('Apply', { close: false, callback: applySettings });
    dialog.addButton('Cancel',{ close: 'fade' });

    return dialog;
}

var settingsDialog = createSettingsDialog();

// dialogs are shown on creation, let's hide it until the settings menu item is clicked
settingsDialog.hide();
And change the initialization of the menu bar:
menu.add('File/Settings', {callback: function() { settingsDialog.show('fade'); } });
- is a library that wraps WebGL to make it more user-friendly by creating classes for managing different items like Buffer, Mesh, Texture, Shader and other common aspects of any WebGL applications.
It helps simplifying working with WebGL without having to handle all the low-level calls but without losing any freedom.
Some features are:
- Easy context creation
- Classes for:
- Meshes and Buffers: Fill a buffer easily and upload it to the GPU
- Textures: load, fill, clone, copy (even blur) for TEXTURE_2D and TEXTURE_CUBE_MAP
- Shaders: compile from string, from file, insert preprocessor macros, extracts all the uniform locations
- FrameBufferObjects: to render to a texture, to multiple textures, to depth texture.
- Some basic primitive shapes (plane, cube, sphere, cylinder, hemisphere).
- OBJ parser and encoder (easy to add new ones)
- Loaders for Images and Meshes from URL (uses a placeholder till its loaded)
- Uses typed-arrays for everything (uses glMatrix for all operations)
- No garbage generated (reuses containers)
- Basic Raytracing (for ray-sphere and ray-plane collision)
- Events system
- Cross-browser input handling for mouse, keyboard and gamepad
- Supports multiple WebGL contexts
- Supports WebGL1 and WebGL2
- Octree class
It is a fork from LightGL.js by Evan Wallace, but some major changes have been made. Some of the main differences:
- Matrices have been replaced by glMatrix
- Meshes are forced to be stored in ArrayBuffer formats
- Meshes support range rendering with offset
- Removed fixed pipeline behaviour
- Better event handling (mouse position, mouse wheel, dragging)
- Textures expanded to support Arraybuffers and Cubemaps
- Events system to trigger events from any object
- Support for multiple WebGL contexts in the same page
This library has been used in several projects like Rendeer.js or Canvas2DtoWebGL.
For a list of similar libraries check this list
Demos
Demos are included in the Examples folder but you can check them in this website.
Usage
Include the library and dependencies
<script src="js/gl-matrix-min.js"></script>
<script src="js/litegl.js"></script>
Create the context
var gl = GL.create({width:800, height:600});
Attach to DOM
document.getElementById("mycontainer").appendChild( gl.canvas )
Get user input
gl.captureMouse();
gl.onmousedown = function(e) { ... }

gl.captureKeys();
gl.onkey = function(e) { ... }
Compile shader
var shader = new GL.Shader( vertex_shader_code, fragment_shader_code );
Create Mesh
var mesh = new GL.Mesh({vertices:[-1,-1,0, 1,-1,0, 0,1,0], coords:[0,0, 1,0, 0.5,1]});
Load a texture
var texture = GL.Texture.fromURL("image.jpg", { minFilter: gl.LINEAR_MIPMAP_LINEAR });
Render
gl.ondraw = function() {
	texture.bind(0);
	var my_uniforms = { u_texture: 0, u_color: [1,1,1,1] };
	shader.uniforms( my_uniforms ).draw( mesh );
}

gl.animate(); //calls the requestAnimFrame constantly, which will call ondraw
For better understanding of all the features and how to use them check the guides folder.
is a lightweight 3D scene graph library, meant to be used in 3D web apps and games. It is meant to be flexible and easy to tweak. It used the library litegl.js as a low level layer for WebGL. It comes with some common useful classes like: Scene and SceneNode Camera Renderer ParticleEmissor And because it uses litegl you have all the basic ones (Mesh, Shader and Texture).
Usage
Here is a brief example of how to use it, but I totally encourage to read the more detailed starter guide stored in the guides folder, or to check the boilerplate provided, and finally check the documentation for better understanding of the API.
First include the library and dependencies
<script src="js/gl-matrix-min.js"></script>
<script src="js/litegl.js"></script>
<script src="js/rendeer.js"></script>
Create the scene
var scene = new RD.Scene();
Create the renderer
var context = GL.create({width: window.innerWidth, height:window.innerHeight});
var renderer = new RD.Renderer(context);
Attach to DOM
document.body.appendChild(renderer.canvas);
Get user input
gl.captureMouse();
renderer.context.onmousedown = function(e) { ... }
renderer.context.onmousemove = function(e) { ... }

gl.captureKeys();
renderer.context.onkey = function(e) { ... }
Set camera
var camera = new RD.Camera();
camera.perspective( 45, gl.canvas.width / gl.canvas.height, 1, 1000 );
camera.lookAt( [100,100,100],[0,0,0],[0,1,0] );
Create and register mesh
var mesh = GL.Mesh.fromURL("data/mesh.obj");
renderer.meshes["mymesh"] = mesh;
load and register texture
var texture = GL.Texture.fromURL("mytexture.png", { minFilter: gl.LINEAR_MIPMAP_LINEAR, magFilter: gl.LINEAR });
renderer.textures["mytexture.png"] = texture;
Compile and register shader
var shader = new GL.Shader(vs_code, fs_code);
renderer.shaders["phong"] = shader;
Add a node to the scene
var node = new RD.SceneNode();
node.color = [1,0,0,1];
node.mesh = "mymesh";
node.texture = "mytexture.png";
node.shader = "phong";
node.position = [0,0,0];
node.scale([10,10,10]);
scene.root.addChild(node);
Create main loop
requestAnimationFrame(animate);
function animate() {
	requestAnimationFrame( animate );

	last = now;
	now = getTime();
	var dt = (now - last) * 0.001;
	renderer.render(scene, camera);
	scene.update(dt);
}
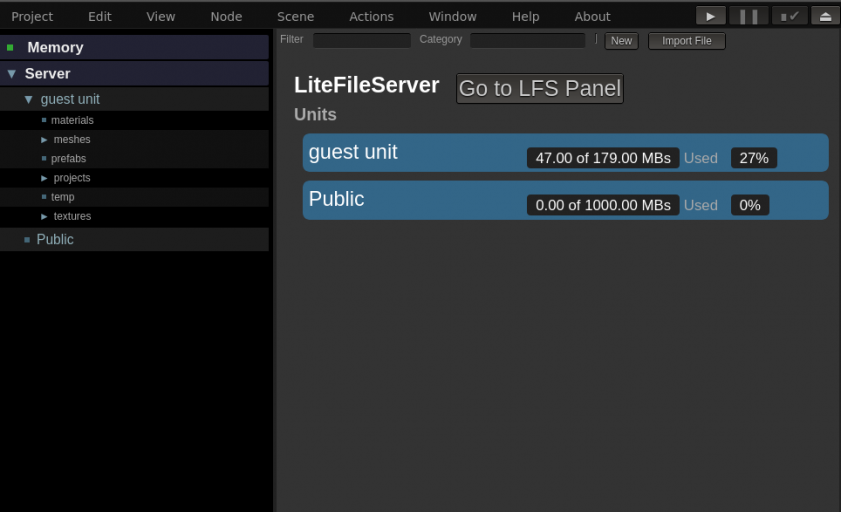
the front-end and back-end library that allows javascript apps to store resources (images, text-files, binaries) in the server. It comes with its own users and units system that allow every user to partition its own space and share it among other users.
Some of the features:
- REST HTTP API for storing, listing, moving, updating or deleting files.
- Basic users (register, login, delete, administration )
- Independent file tree per user
- Units, users can have several units to store files and share with other users
- Files can have thumbnail image and metadata
Usage
Once installed you can include the litefileserver.js script in your project you must first login:
var lfs = LFS.setup("myhost", onReady );
var session = null;

//check to see if the server is available
function onReady()
{
   LFS.login( username, password, onLogin );
}

function onLogin( my_session, err )
{
   if(!my_session)
      throw("error login in:", err);
   session = my_session;
}
Once logged you can fetch for files and folders using the session:
session.getUnitsAndFolders( function(units) {
  //units contain info about every unit and which folders it has
});

session.getFiles( unit_id, folder, function( files ) {
  //info about the files in that folder
});
Check the LFS.Session class for more info about all the actions you can perform (create folders, units, give privileges, upload files, etc).
Also check the demo in the src folder to see an usage of the system.
текстовый код для разбивки и оформления интернет станиц
http://www.w3schools.com - html инструкции
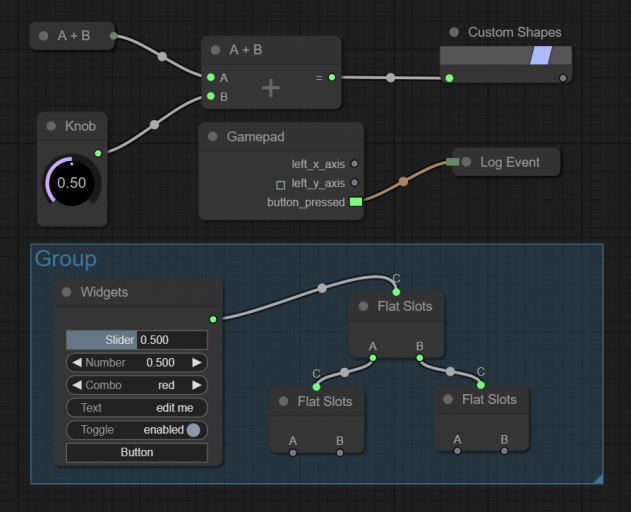
nodes can be programmed easily and it includes an editor to construct and tests the graphs. It can be integrated easily in any existing web applications and graphs can be run without the need of the editor.
Features
- Renders on Canvas2D (zoom in/out and panning, easy to render complex interfaces, can be used inside a WebGLTexture)
- Easy to use editor (searchbox, keyboard shortcuts, multiple selection, context menu, ...)
- Optimized to support hundreds of nodes per graph (on editor but also on execution)
- Customizable theme (colors, shapes, background)
- Callbacks to personalize every action/drawing/event of nodes
- Subgraphs (nodes that contain graphs themselves)
- Live mode system (hides the graph but calls nodes to render whatever they want, useful to create UIs)
- Graphs can be executed in NodeJS
- Highly customizable nodes (color, shape, slots vertical or horizontal, widgets, custom rendering)
- Easy to integrate in any JS application (one single file, no dependencies)
- Typescript support
examples video: http://github.com/jagenjo/litegraph.js
Nodes provided
Although it is easy to create new node types, LiteGraph comes with some default nodes that could be useful for many cases:
- Interface (Widgets)
- Math (trigonometry, math operations)
- Audio (AudioAPI and MIDI)
- 3D Graphics (Postprocessing in WebGL)
- Input (read Gamepad)
Installation
You can install it using npm
npm install litegraph.js
Or downloading the build/litegraph.js and css/litegraph.css version from this repository.
First project
<html>
<head>
	<link rel="stylesheet" type="text/css" href="litegraph.css">
	<script type="text/javascript" src="litegraph.js"></script>
</head>
<body style='width:100%; height:100%'>
<canvas id='mycanvas' width='1024' height='720' style='border: 1px solid'></canvas>
<script>
var graph = new LGraph();

var canvas = new LGraphCanvas("#mycanvas", graph);

var node_const = LiteGraph.createNode("basic/const");
node_const.pos = [200,200];
graph.add(node_const);
node_const.setValue(4.5);

var node_watch = LiteGraph.createNode("basic/watch");
node_watch.pos = [700,200];
graph.add(node_watch);

node_const.connect(0, node_watch, 0 );

graph.start()
</script>
</body>
</html>
How to code a new Node type
Here is an example of how to build a node that sums two inputs:
//node constructor class
function MyAddNode()
{
  this.addInput("A","number");
  this.addInput("B","number");
  this.addOutput("A+B","number");
  this.properties = { precision: 1 };
}

//name to show
MyAddNode.title = "Sum";

//function to call when the node is executed
MyAddNode.prototype.onExecute = function()
{
  var A = this.getInputData(0);
  if( A === undefined )
    A = 0;
  var B = this.getInputData(1);
  if( B === undefined )
    B = 0;
  this.setOutputData( 0, A + B );
}

//register in the system
LiteGraph.registerNodeType("basic/sum", MyAddNode );
or you can wrap an existing function:
function sum(a,b)
{
   return a+b;
}

LiteGraph.wrapFunctionAsNode("math/sum",sum, ["Number","Number"],"Number");
Server side
It also works server-side using NodeJS although some nodes do not work in server (audio, graphics, input, etc).
var LiteGraph = require("./litegraph.js").LiteGraph;

var graph = new LiteGraph.LGraph();

var node_time = LiteGraph.createNode("basic/time");
graph.add(node_time);

var node_console = LiteGraph.createNode("basic/console");
node_console.mode = LiteGraph.ALWAYS;
graph.add(node_console);

node_time.connect( 0, node_console, 1 );

graph.start()
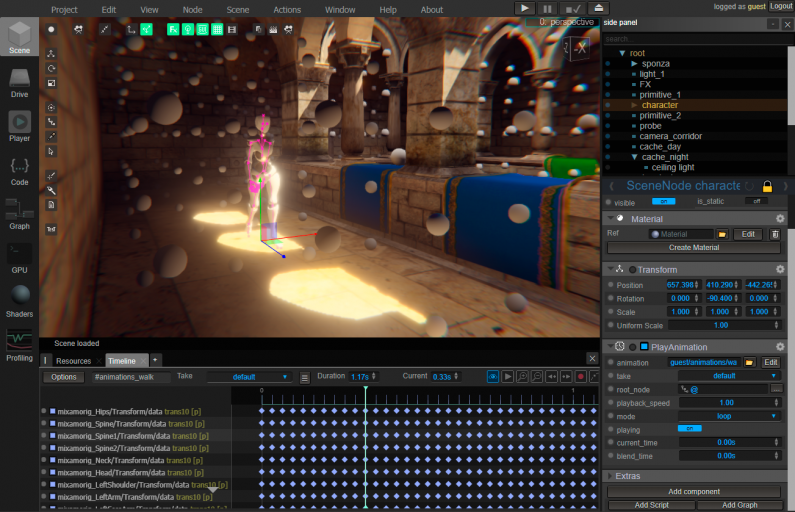
Litescene is a scene graph library for WebGL with a component based hierarchical node system. It comes with a realistic rendering pipeline and some interesting components to make it easier to build and share scenes. Component based node system Realistic rendering pipeline, it supports shadows, reflections, textures for all properties, etc Material system that automatically computes the best shader, making it easy to control properties Resources Manager to load and store any kind of resource ( textures, meshes, etc) Serializing methods to convert any Scene to JSON Parser for most common file formats Easy to embed It uses its own low-level library called litegl.js
Usage
Include the library and dependencies
<script src="external/gl-matrix-min.js"></script>
<script src="external/litegl.min.js"></script>
<script src="js/litescene.js"></script>
Create the context
var player = new LS.Player({
	width:800, height:600,
	resources: "resources/",
	shaders: "data/shaders.xml"
});
Attach to Canvas to the DOM:
document.getElementById("mycontainer").appendChild( player.canvas )
or you can pass the canvas in the player settings as { canvas: my_canvas_element }
Load the scene and play it:
player.loadScene("scene.json");


